
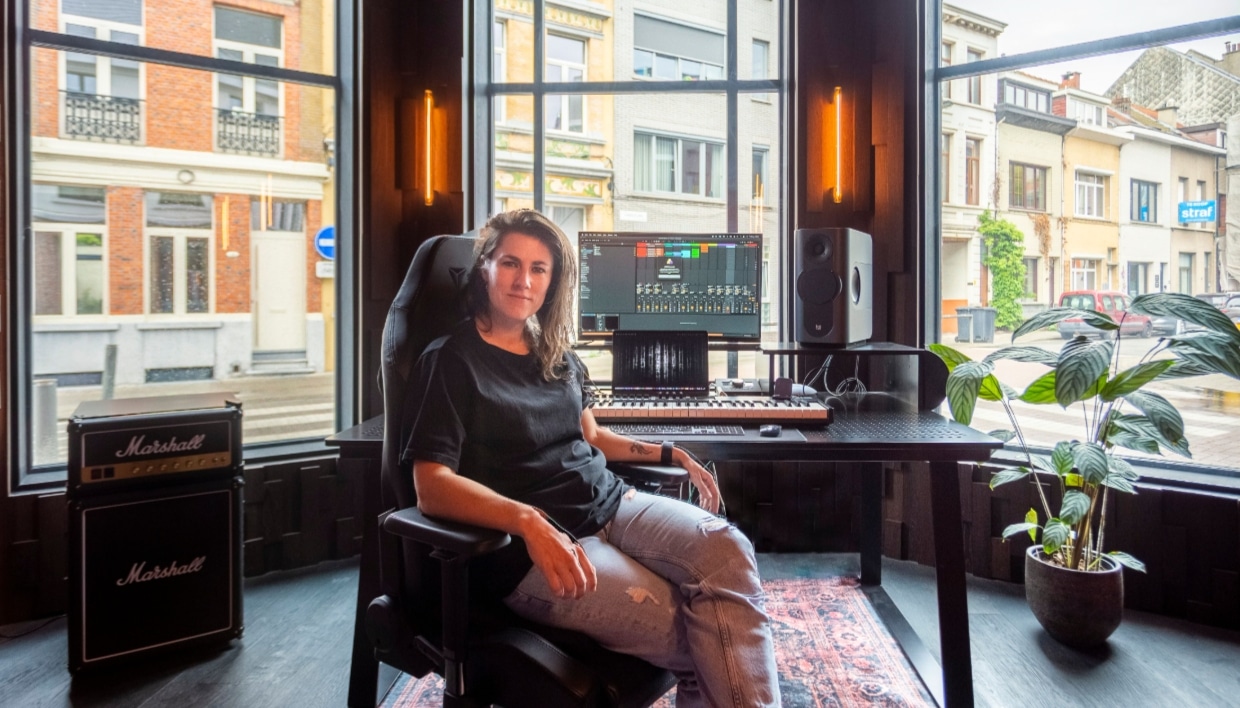
AFFKT on resampling Kontakt: Real-time recording and mixing advice
[ad_1]
What’s one lesson you’ve learned about managing your Kontakt library and sessions to keep everything efficient?
A key lesson I have learned over the years is the importance of organization in the studio. However, while I am very organized in many ways, in others, not so much when it comes to Kontakt, I am the opposite of organized.
While having it structured would save me a lot of time, I occasionally enjoy getting lost in it. Setting up consistent naming conventions and templates, and regularly cleaning up my sessions and library would save me a lot of time, but I’m still working on making it a habit…. one day!
Pro tip from AFFKT: Find your own way to get the most out of Kontakt, it’s an inexhaustible source of sounds so enjoy exploring.
[ad_2]
Source link

How to find your sound: Bluey Thomas on finding your vibe without breaking the bank
[ad_1]
A lot of producers worry about overspending on tools – how do you decide what’s worth the investment?
Whatever you use frequently is worth it. For example, I use a lot of vocal chains and mixing plugins because I also engineer all of my records myself, so the pro-vocal processing plugins get used on almost everything.
As far as production tools go, if I find that I haven’t used something in a few months, I’ll get rid of it.
Sometimes I do find myself even re-buying plugins when the need arises, but overall, I believe that investing in your craft is a good idea. There are a lot worse things that people spend their money on, so I just remind myself that this is for my career and my success in the future.
Tips from Bluey Thomas: During my first few years, I was creating as much as I could, as often as I could. To be great you need to put in the reps and there’s no shortcut.
Another thing that helped me was soaking in as much information as I could. From podcasts, magazines, interviews, YouTube videos, and production breakdowns, I’m constantly consuming these types of things to keep myself inspired. Just look at it like studying!
[ad_2]
Source link
How to use delay when making techno: AM.I shares her thoughts on Replika XT
[ad_1]
Start creating space and atmosphere with delay
A huge thanks to AM.I for making time in her packed schedule to chat about using delay in techno. The biggest takeaway here is that delay should always be used with intention. It takes up a lot of space in a mix, and while it might sound great on its own, overusing it can easily clutter things.
If it’s not fitting perfectly, it’s better to remove it and let the mix breathe.
Another key point is that delay isn’t just about adding depth or rhythm – it’s a powerful sound design tool. When used intentionally, it can shape the tone and energy of a track in ways that go beyond simple echoes. Replika XT, in particular, brings a gritty, colorful texture that stands out when used sparingly.
Try out some of these techniques in your next track, and see how intentional delay use can transform your mix. Check out Replika XT below.
[ad_2]
Source link

Why Massive is still everywhere: Lawrence Hart on its ongoing influence
[ad_1]
New plugins, sample libraries, and production tools drop every day, but only a handful of VSTs and soft synths keep showing up in producers’ go-to arsenals. One of those is Massive. It’s a staple – one that artists in our community keep coming back to and talking about almost every week.
So what makes the original Massive so enduring? We sat down with Lawrence Hart, a UK-based DJ, producer, and multi-instrumentalist, to find out.
Hart is gearing up for a big year – Come In Out Of The Rain is out now on Domino’s Double Six, which you can get here. Both digitally and as an exclusive Domino Mart LP with a limited signed and hand-numbered artwork poster, Standard black LP, CD and download, blending garage, soaring synths, and melancholic vocal samples into a euphoric, club-ready record.
The album includes his recent singles “Closer to You,” “NoMoreLuv4U,” and “Just Belong,” which have already earned support from BBC Radio 1, Mixmag, and Spotify’s Altar playlist. Fans can also grab a limited-edition LP with signed artwork and posters ahead of his upcoming live performance at iconic Corsica Studios in London in late April.
[ad_2]
Source link
How to create the signature Reese bass sound
[ad_1]
The sampled Reese bass was a sensation in the nascent jungle scene, as up to this point jungle bass lines were typically pure sine tones without harmonics above the fundamental, for instance sine subs and 808 basses. The Reese bass features harmonics above the fundamental, which gives the bass a bigger, fuller sound, and the rumbling movement of these harmonics give the sound a sinister feel all of its own.
Other famous jungle tracks that sample the Reese bass include Remarc’s “R.I.P. (DJ Hype Remix)” and Ed Rush’s “The Force Is Electric (Remix).”
[ad_2]
Source link

Modulation-maxxing in Massive X: FRANCO BA breaks down how to make any patch come alive
[ad_1]
When you’re building a sound, do you plan your modulation from the start, or does it happen naturally as you tweak?
Often, the creative process is quite organic. I usually start with a basic patch and leave room for exploration and experimentation, which allows me to discover modulation settings I hadn’t planned from the outset. This spontaneous approach often leads to unique and unexpected results.
However, there are times when I have a clear vision of the final sound. In those cases, I plan the modulation from the very beginning, mapping out specific routes that enhance the intended character. This method helps maintain a coherent direction while developing the sonic idea, ensuring every modulation element serves a purpose.
Ultimately, flexibility is crucial. Sometimes the initial idea evolves, and modulation becomes a process of discovery, allowing you to fine-tune the sound intuitively. This blend of planning and experimentation truly enriches the sound design process.
[ad_2]
Source link

Mustard at Coachella: celebrating the producer behind your favorite beats
[ad_1]
After handing off his exclusive gear to him at his Los Angeles’ rehearsals, Mustard was excited to break in his new gear at Coachella, telling us — “Maschine and the Kontrol S49 are powerful tools I’ve always respected—they make it easy to get ideas down fast and add real musicality. I just got my custom MK3 in time for Coachella, so I’m looking forward to breaking it in on stage in front of the hundreds of thousands of people there and watching online!”
Mustard delivered a high-energy set that thrilled the massive crowd. Mustard’s groundbreaking performance celebrated his legacy across production and nodded to his roots as a DJ, brought to life by bringing a replica of his own studio. His performance included surprise guest appearances from Tyga, 2 Chainz, YG, Big Sean, Roddy Ricch and Ella Mai.
[ad_2]
Source link

Shaping groove and tone with Transient Master: N2N on perfect hi-hats
[ad_1]
The hi-hat’s timing, dynamics, and tonal characteristics can make a groove bounce, swing, feel energetic, or laid-back.
A transient with a hi-hat refers to the initial, sharp attack sound produced when the hi-hat cymbals first strike each other or when a stick hits a single hi-hat cymbal.
Transient shapers like Transient Master can enhance the impact of hi-hats by:
- Boosting the attack: This adds sharpness and clarity, making the hi-hats cut through the mix and feel more present.
- Taming the attack: If the hi-hats are too harsh or piercing, reducing the attack can smooth them out and make them sit better in the mix.
- Adjusting the sustain: Increasing the sustain can make closed hi-hats feel fuller and more resonant, while reducing it can tighten them up and prevent them from clashing with other elements.
If you take a look at the screenshots provided throughout this chat, you’ll see how easy Transient Master’s UI is, even for beginner producers. Taming the attack helps when you like to layer multiple hi hats on top of each other, especially when a few of those layers have sharp attack. It creates a better blend and a more lush mix that’s full, not piercing. If your hats aren’t providing the punch you want, boost the attack and you’ll hear them cut through more sharply.
See the provided audio examples below for a Transient Master at work with a shaker. You’ll hear the stark difference between a reduced and boosted attack.
[ad_2]
Source link

Learn from Rabbithology’s DIY folktronica process: making demo-ready mixdowns in your dorm
[ad_1]
What’s the biggest lesson you’ve learned about mixing while creating Living Ghost?
If you have a project with 400+ tracks, just send it to someone else to mix to preserve your mental state.
Teasing!
Though, once again, I must thank Zhengxi Zhang for refining my demos of “Intro,” “Preybirds (Watcher Song),” “Butcheress,” and “Wildfire (Gone, Gone, Gone) / Death Song” beyond what I could do in the refines of my dorm + the time restraints I have being a student (you can blame Econ 101 and other math classes for having this EP come out a year later than I planned!)
The real lesson I’ve learned is that each song’s mixing and production has an “ugly phase” – where the frequencies rub the ears in just the wrong way, where the percussion doesn’t hit like you want, where the bass leaves your ears ringing, but you swear it still isn’t strong enough. What I always keep in mind – as I’m holding onto a demo I’m ashamed to send off, and the deadline creeps closer and closer – is that it’s gotta get worse before it gets better.
Don’t be discouraged when your first “rough mix demo” pass sounds worse than the unmixed or unproduced version. Sometimes you need to redo the whole thing, but at least now you know what the song absolutely should not sound like. It may be long and difficult, but as you slowly learn how the tools and techniques improve your track’s character, it’ll get better.
Pro tip from Rabbitology: Sometimes a good project takes time. Sometimes a good project takes no time at all. Each mixing and production process is different, and trust it no matter what path it takes. Don’t try to rush, don’t try to take it too slow.
[ad_2]
Source link
How to layer leads without muddying your mix
[ad_1]
7. Be intentional with transients
If the ADSR envelope shapes the macroevolution of your layers, transients operate on a micro-scale, controlling how each sound’s initial impact to the listener. Being intentional about your transients is crucial for creating clean, crisp mixes. Let’s break it down into two main points.
First, contrasting transients help avoid overlapping volume spikes. If two layers in your lead have identical plucky transients hitting at the same time, you’ll create a sudden volume bump that eats into your headroom – a critical resource for later mixing stages. Tools like Transient Master in Kontakt or Komplete can give you precise control here.
For instance, if your primary layer has a sharp, punchy attack, lean into it by boosting that transient and then, on your supporting layers, soften the attack to avoid conflict, ensuring the primary layer dominates those first milliseconds of the sound.
Second, transients affect the perceived depth of your mix. Humans associate sharper, more detailed transients with closer sounds, while softer attacks naturally feel farther away. Think of it like snapping your fingers: up close, you hear every detail, but from across the room, it’s much fainter and less detailed.
Transient shaping tools can help create this sense of depth.
The audio example below shows just that. Drawing out the transients of the plucky layer helps the softer layer underneath have its own room to breath.
[ad_2]
Source link